The crostini. It’s a perfectly toasted piece of artisanal bread topped with whatever your heart can imagine. A blank slate for savory or sweet… or both.
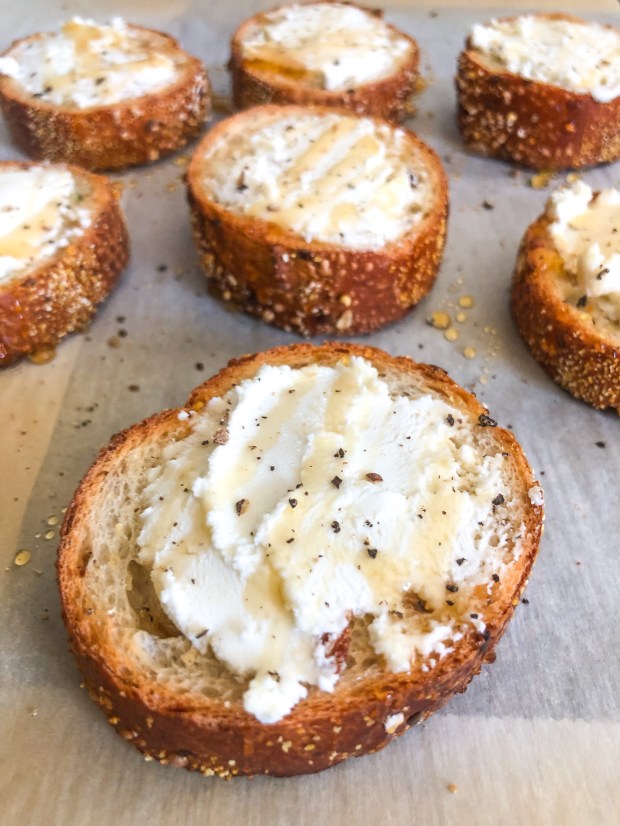
This one I made is simple and straight to the point: bread, goat cheese, honey, fresh cracked pepper.
I bought a wheat based bread covered in seeds because I enjoy the layers of texture.

I sliced the bread, gave a generous drizzle of olive oil on top of the bread, baked for approximately 5 minutes until toasted, slathered the goat cheese on top, drizzled golden honey, and sprinkled with fresh cracked pepper.
Taste:
Crunchy, seedy bread.
Light sweetness from the honey.
Tang from the goat cheese.
Bite from the pepper corns.

What I love about this appetizer is that it’s good for any occasion and doesn’t require much time to put together. It’s portable and can be brought to any get together, game night, girls night, or any other occasion you can think of. It’s also very easy to change up and make it your own.
It’s Simple. Easy. Perfection.
GOAT CHEESE HONEY & CRACKED PEPPER CROSTINI
INGREDIENTS:
1 French baguette, sliced
Olive oil, for drizzling
4 ounces goat cheese
Cracked black pepper
Salt
Honey, for drizzling
INSTRUCTIONS:
- Preheat oven to 400 degrees Fahrenheit.
- Place slices of the French baguette on a sheet tray.
- Drizzle the olive oil, and add a pinch of salt to the bread slices and bake for 5 minutes or until bread is golden brown.
- When the bread is finished, let it cool until it’s easy to handle. Scoop some of the goat cheese and spread on to each slice.
- Drizzle with honey, and finish with freshly ground cracked pepper.
- Serve immediately.
What are some of your favorite toppings? Comment below!

